Saturday, November 15, 2008

Tutorial 1 for MCG 1024 G


50) go to the layer pallet and choose drop shadow to apply TV shadow.
51) We no need to set any figure inside the box, just click the images of the TV to drop out the shadow as you like.
52) Now, temporary turn off the TV layer to apply side shadow on the TV. And create a brand new layer.
53) Press L key for the lasso tool, and drag the line on the side shadow with pressing the alt key to make a box.
54) to making the box become black color, hold the alt key and press the backspace. And press ENTER.
55) select the FILTER again, and click on blur to Gaussian blur for setting which is radius 5.0 pixels.
56) turn on the TV layer again, use the lasso tool drag the line to the TV image, first click on the layer 1 and second click on the layer 2 to apply the black shadow on the TV image.
57) go to the layer pallet and click on the opacity to 45%.
58) And the last click on the TAB key to disable all the pallet to show clearly for the while image.

Tutorial 1 for MCG 1024 F


42) press ctrl + D do de-select the marquee
43) go to the pop up menu click the side icon and select flatten image
44) press the V key to move the TV image to skyscrapers.
45) drag the TV layer to the bottom of the starfish layer
46) click on the TV and press ctrl + T to select the TV
47) scale and resize the TV by clicking shift key.
48) press the ctrl key can pull and band the images too. just fix the TV's image on the building from the first window until the last window.
49) press ENTER after u finish the adjusting.

Tutorial 1 for MCG 1024 E


35) click V to move tool.
36) browse the picture which clicking the giant TV screen.tif
37) create a new layer on the giant TV screen
38) click the rectangle marquee tool to select the screen area on the TV. press ctrl + delete.
39) go to FILTER select sketch option and choose halftone pattern
40) change the pattern type to become line, modify the size to become more thicker but not too thick. contract can be adjusted but not effect too much. and click OK.
41) and we go to the layer palate and choose overlay

Tutorial 1 for MCG 1024 D


22) to select the biggest starfish by using ctrl and click on it
23) click FILTER select radial blur, select blur method: zoom, quality:best, amount:20
24) and the starfish will look like drop a high speed.
25) to undo click ctrl + z
26) click EDIT and choose fade radial blur to adjust opacity. This is the another method to make the starfish look like dropping by a high speed.
27) click the layer of the biggest starfish, drag it down to the new layer icon.
28) apply the radial blur effect again by choosing the FILER, simply choosing radial which on the first.
28) hide it if u wanna see the original starfish.
29) move the copy down to the origin layer again.
30) select the origin starfish and click add vector mask
31) to make the field of the mask become black color, click ctrl + backspace
32) go to the tool pallet and choose the brush tool color is automatically set to white color.
33) adjust the brush to 700px.
34) click on the center of the starfish to see the focus effect on the starfish.

Tutorial 1 for MCG 1024 C


18) click on the left hand side starfish by ctrl key to select it.
19) apply Gaussian blur by clicking the FILTER key with (3.0 pixels).
20) click on the smaller starfish by using ctrl to select it.
21) apply Gaussian blur by clicking the FILTER key with (4.5 pixels).

Tutorial 1 for MCG 1024 B


8) ctrl + shift + O to browse the starfish.psd
9) click V to become move tool and click the starfish out to the skyscraper picture.
10) to clear all the guide click VIEW and click CLEAR GUIDE
11) ctrl + R to hide the ruler
12) click on the starfish and press ctrl + T to modify it
13) press shift key to resize the starfish
14) to make sure the height and the height is the same value, click lock key on the top of the tool bar. And rotate the starfish press ENTER.
15) Hold the alt click and drag another starfish. Remove this copy layer under the origin layer.
16) Once again repeat the step 12 to 14 to resize the new starfish.
17) Repeat the step 15 again for the third starfish and apply step 12 to 14 on it.

Tutorial 1 for MCG 1024 A


This is my first tutorial in this semester for MCG 1024. And i will elaborate all the step out to describe how i accomplish my tutorial 1.
1) Open Photoshop.exe
2) Browse the picture name skyscrapers.jpg
3) ctrl + R to show out ruler.
4) press F to fix the picture in the middle.
5) pull out the horizontal and vertical ruler to separate the picture become 4 parts.
6) click elliptical marquee tool to make a circles in the center of the picture
7) apply blur effect on it which is Gaussian blur (5.6).

Thursday, September 4, 2008

Finalize for assignment 3


This is my final stage for my assignment 3.. And i have to print it out..

Description:

The tree has always been a cultural symbol. Common icons are the World Tree, for instance Yggdrasil, and the tree of life. The tree is often used to represent nature or the environment itself.

Whether you plant trees around your home and property, in your community, or in our national forests, they help fight global warming. Through the natural process of photosynthesis, trees absorb CO2 and other pollutant particulates, then store the carbon and emit pure oxygen.

The results are in and the reality of global warming is beyond dispute or debate. It’s not just an environmental issue. It affects our public health and national security. It’s an urgent matter of survival for everyone on the planet — the most urgent threat facing humanity today. This is means it’s going to take action from human and tree working together to solve the problem of global warming.


Wednesday, September 3, 2008

Presentation - Assignment 3


Because my friend said my poster seems very blank, and i add on some frame on my poster. To make my poster more colorful.

Friday, August 29, 2008

Wednesday, August 27, 2008

My sketch - poster (Third Stage)


After i consult Dr.Ken, he give me some suggest for my poster. And here is my new poster. The message that i give from the poster is: FIGHT FOR OUR LIFE!

Tuesday, August 26, 2008

My sketch - poster (Second Stage)


I have progress to next stage for my poster. And i had add some global warming symbol on the tree. Which is means tree, can save the life and ignore global warming.
Every symbol i have use pen tool to trace it out. The effect i apply on my symbol is: brush, pen tool, line, shape and so on.
And here is my poster..

Sunday, August 24, 2008

My sketch - poster (First Stage)


This is my first stage if my poster:
1) I had use brush to draw the trunk.
2) And i use pen tool trace the leave and apply graphic style on it.
3) Lastly, i also apply some blur effect on all the leave.

Saturday, August 23, 2008

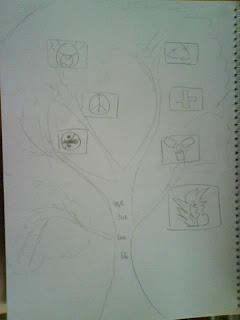
My third sketch - poster


This is reference for the poster and i sketch it out:

Friday, August 22, 2008

Assignment 3 - poster


I have been doing some image research for poster:

Sunday, August 17, 2008

Finalize for assignment 2

1) I had change my TREE, and i use some SPECIAL method to draw it. Don't worry, it is full of leave on the TREE.

Description:

Trees and humankind have always had a symbiotic relationship. Since they evolved, trees have had a great influence on the shaping of the ecology of our planet. By means of photosynthesis the leaves combine the water and salts with carbon dioxide from the air to produce the nutrients which feed the tree. In this process, as well as trees create many chemicals, seeds and fruit of great utility to man. Trees also remove carbon dioxide, the main greenhouse gas, from the air.

However, growing populations and increasing development slowly changed the face of the earth. The forested area of the earth is steadily being depleted. This is leading to the degradation of the environment and the extinction of many species. There is now a real danger that in the not very distant future man will destroy a large proportion of the present population of species on earth, create an uninhabitable environment, and then eventually die out.

Therefore, it is important that we conserve our mother nature so that our younger generation does not have to live in a world without greens.


2) To see more details of the tree.

Saturday, August 9, 2008

My sketch - Tree (stage 5)

1) And now, i also use pen tool to trace out the land which beside the river by using graphic style panel for choosing the color of the land.


2) And use the pen tool also, trace out the river, and color it by using graphic style panel tool.


3) And lastly, i use pen tool trace out the sky with graphic style panel for the color too. Conclusion, my tree's sketch is done. And i will arrange all the layer properly to make whole picture ook more nice.


Friday, August 8, 2008

My sketch - Tree (stage 4)

1) I had use spray to make small tree under the forest.


2) And i make another grass field around the tree too. (same method with grass around the forest)

Thursday, August 7, 2008

My sketch - Tree (stage 3)

1) I have use the same method which is brushes and spray on my forest behind the tree.


2) The grass is using pen tool trace it out with select the graphic style for the color.