Saturday, November 15, 2008

Tutorial 1 for MCG 1024 G


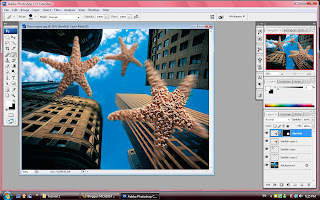
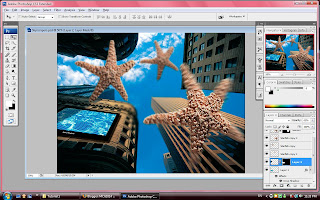
50) go to the layer pallet and choose drop shadow to apply TV shadow.
51) We no need to set any figure inside the box, just click the images of the TV to drop out the shadow as you like.
52) Now, temporary turn off the TV layer to apply side shadow on the TV. And create a brand new layer.
53) Press L key for the lasso tool, and drag the line on the side shadow with pressing the alt key to make a box.
54) to making the box become black color, hold the alt key and press the backspace. And press ENTER.
55) select the FILTER again, and click on blur to Gaussian blur for setting which is radius 5.0 pixels.
56) turn on the TV layer again, use the lasso tool drag the line to the TV image, first click on the layer 1 and second click on the layer 2 to apply the black shadow on the TV image.
57) go to the layer pallet and click on the opacity to 45%.
58) And the last click on the TAB key to disable all the pallet to show clearly for the while image.
Tutorial 1 for MCG 1024 F


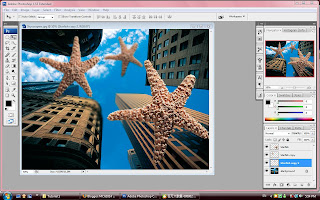
42) press ctrl + D do de-select the marquee
43) go to the pop up menu click the side icon and select flatten image
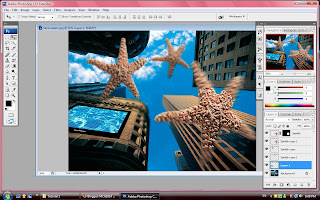
44) press the V key to move the TV image to skyscrapers.
45) drag the TV layer to the bottom of the starfish layer
46) click on the TV and press ctrl + T to select the TV
47) scale and resize the TV by clicking shift key.
48) press the ctrl key can pull and band the images too. just fix the TV's image on the building from the first window until the last window.
49) press ENTER after u finish the adjusting.

Tutorial 1 for MCG 1024 E


35) click V to move tool.
36) browse the picture which clicking the giant TV screen.tif
37) create a new layer on the giant TV screen
38) click the rectangle marquee tool to select the screen area on the TV. press ctrl + delete.
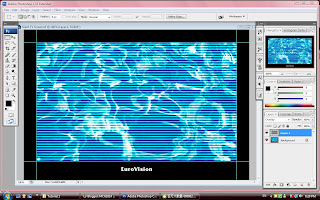
39) go to FILTER select sketch option and choose halftone pattern
40) change the pattern type to become line, modify the size to become more thicker but not too thick. contract can be adjusted but not effect too much. and click OK.
41) and we go to the layer palate and choose overlay

Tutorial 1 for MCG 1024 D


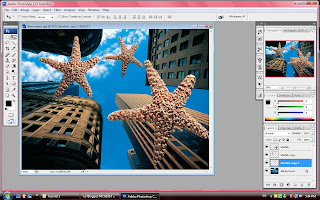
22) to select the biggest starfish by using ctrl and click on it
23) click FILTER select radial blur, select blur method: zoom, quality:best, amount:20
24) and the starfish will look like drop a high speed.
25) to undo click ctrl + z
26) click EDIT and choose fade radial blur to adjust opacity. This is the another method to make the starfish look like dropping by a high speed.
27) click the layer of the biggest starfish, drag it down to the new layer icon.
28) apply the radial blur effect again by choosing the FILER, simply choosing radial which on the first.
28) hide it if u wanna see the original starfish.
29) move the copy down to the origin layer again.
30) select the origin starfish and click add vector mask
31) to make the field of the mask become black color, click ctrl + backspace
32) go to the tool pallet and choose the brush tool color is automatically set to white color.
33) adjust the brush to 700px.
34) click on the center of the starfish to see the focus effect on the starfish.

Tutorial 1 for MCG 1024 C


18) click on the left hand side starfish by ctrl key to select it.
19) apply Gaussian blur by clicking the FILTER key with (3.0 pixels).
20) click on the smaller starfish by using ctrl to select it.
21) apply Gaussian blur by clicking the FILTER key with (4.5 pixels).

Tutorial 1 for MCG 1024 B


8) ctrl + shift + O to browse the starfish.psd
9) click V to become move tool and click the starfish out to the skyscraper picture.
10) to clear all the guide click VIEW and click CLEAR GUIDE
11) ctrl + R to hide the ruler
12) click on the starfish and press ctrl + T to modify it
13) press shift key to resize the starfish
14) to make sure the height and the height is the same value, click lock key on the top of the tool bar. And rotate the starfish press ENTER.
15) Hold the alt click and drag another starfish. Remove this copy layer under the origin layer.
16) Once again repeat the step 12 to 14 to resize the new starfish.
17) Repeat the step 15 again for the third starfish and apply step 12 to 14 on it.

Tutorial 1 for MCG 1024 A


This is my first tutorial in this semester for MCG 1024. And i will elaborate all the step out to describe how i accomplish my tutorial 1.
1) Open Photoshop.exe
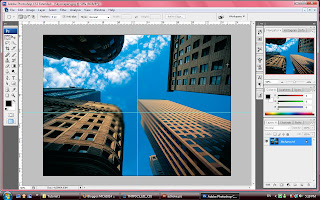
2) Browse the picture name skyscrapers.jpg
3) ctrl + R to show out ruler.
4) press F to fix the picture in the middle.
5) pull out the horizontal and vertical ruler to separate the picture become 4 parts.
6) click elliptical marquee tool to make a circles in the center of the picture
7) apply blur effect on it which is Gaussian blur (5.6).