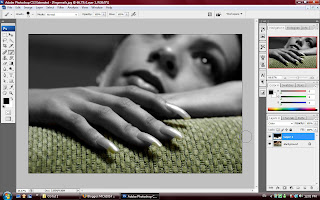
1) first, open the file browser and open the file name fingernails.jpg.
2) while u open the file, just press F key to make it become full screen.
3) if the picture looks small, just press ctrl + + key to make it become bigger and become smaller just press ctrl + - key.
4) go to the IMAGE click MODE and choose GREYSCALE. it will appear a box to ask your for discard the picture or not and just press it OK.
5) to undo it just press ctrl + Z.
6) click the brush tool on the panel, and change the tool size become 100pixels.
7) just make sure that change white as a background and black as the foreground to press D key.
8) go to the MODE menu on the option bar, choose COLOR option. you can color any part of the picture as u like by brush tool.
9) create a new layer, and go to the COLOR MODE change back to NORMAL.
10) if you brush on the picture by NORMAL MODE it will become black color on the picture, but if u change mode on the layer to COLOR mode, it's automatically become gray color.
11) now, color the people image inside the picture to become gray color.


